Showing posts with label body work. Show all posts
Tuesday, October 2, 2012
Let Me Hear Your Body Talk!
Sunday, November 13, 2011
Back to The Grind(er)

Life has finally slowed down enough to allow me to get back into the garage, and back onto Matilda! It has taken me a bit to get my head back into the project, but I think I have a plan of attack. I've spent the last few weekends sand blasting small parts, and this weekend, I broke out the wire wheel. So now I have the Hood, fenders, one door, various hinges and the rear bumper panel ready for jamb-painting. I had been planning to do the final paint, as well as all of the ensuing body work, myself. Fortunately, I came to the realization a few weeks ago that that would only serve to frustrate me, and drag this project out even longer. So I have decided to find a good body and paint man to do the finish work. I fully plan to have this baby on the road next summer, so that should help. As near as I can figure, I have the passenger door to strip, and I should be ready to start the painting process all over again. It's so nice to be making real progress again!
Labels:
1971,
body work,
Corvallis,
Honda n600,
Oregon,
restoration,
sandblasting
Sunday, March 20, 2011
Details, Details...
Among the many things this project has taught me, is the importance of observing the sequence of events. At some point in the car's life, someone decided to relocate the radio antenna from its original location above the driver's side "B" pillar to above the passenger side "A"
pillar. It looked like they had done this with the assistance of a can opener. One of the first body repairs I did a few years ago was to patch that gaping wound. I had not done the kind of job that would be unnoticeable under the final paint job, so I knew at some point I would have to revisit it. I've been trying to get the car ready for the windshield and exhaust system installations, and it occurred to me that I'd better get that old patch cleared up before a portion of it was covered by the windshield gasket. I've also been on the fence about the quality of the interior paint job, so I decided to sand, mask and repaint the visible surf
aces while re-shooting the windshield bed. It was a lot of work for such a minor result, but I knew it would bug me later to see essentially textured paint while sitting in the car, which I hope we do a lot.
Here's a little video of my folks taking Matilda around the block. I love the perspective as they drive past full size vehicles.
pillar. It looked like they had done this with the assistance of a can opener. One of the first body repairs I did a few years ago was to patch that gaping wound. I had not done the kind of job that would be unnoticeable under the final paint job, so I knew at some point I would have to revisit it. I've been trying to get the car ready for the windshield and exhaust system installations, and it occurred to me that I'd better get that old patch cleared up before a portion of it was covered by the windshield gasket. I've also been on the fence about the quality of the interior paint job, so I decided to sand, mask and repaint the visible surf
aces while re-shooting the windshield bed. It was a lot of work for such a minor result, but I knew it would bug me later to see essentially textured paint while sitting in the car, which I hope we do a lot.Here's a little video of my folks taking Matilda around the block. I love the perspective as they drive past full size vehicles.
Sunday, March 6, 2011
Let The Body Work Begin!
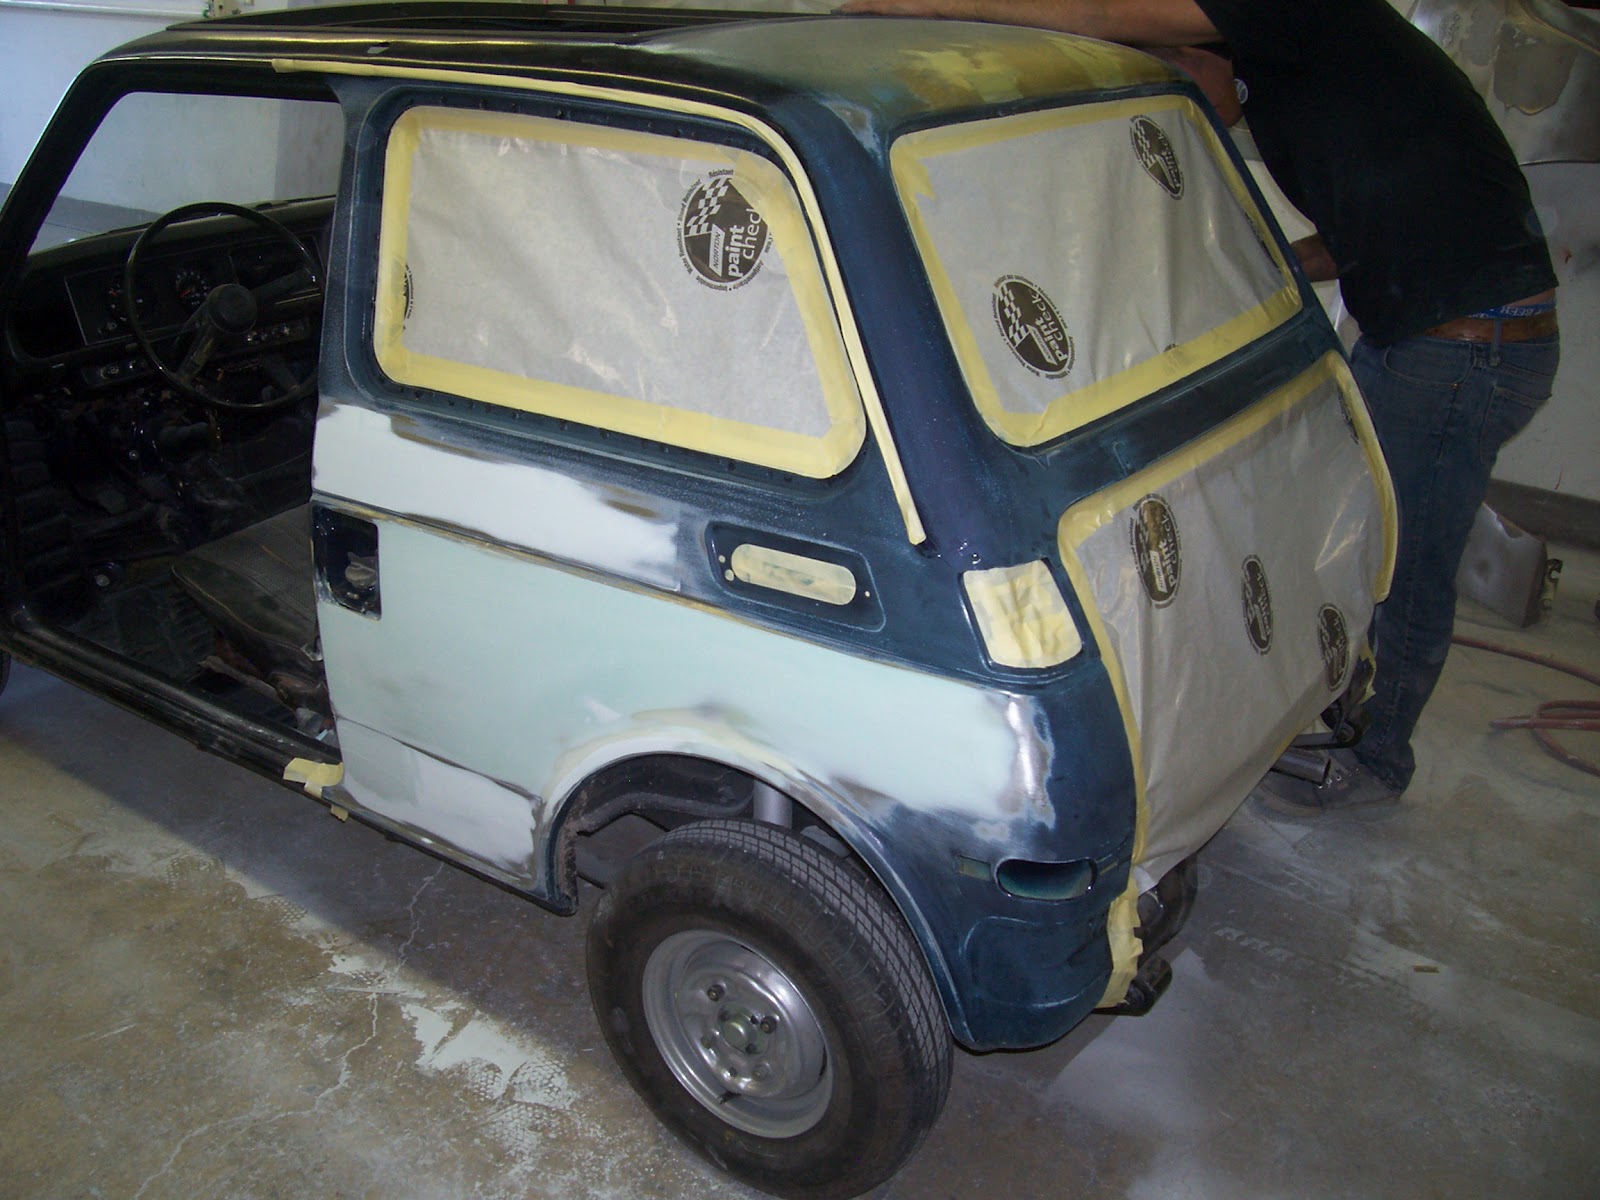
I've been looking at two dents in the roof for about four years now, and I decided that today was the day to do something about them. Their size and spacing suggest that someone made an ill-fated attempt to put a roof rack on this car. Clearly, if you have furniture to buy, you should take something else to Ikea. When we first acquired this body, I attempted to get a few different body tools into the tight space beneath these dents to no avail. This only left me with one option: I needed a stud pin welder! This is one of the better inventions to happen to the auto body industry in the last generation. You simply load a small copper-coated steel pin into the gun, press the tip into the lowest point of a dent and pull the trigger. In less than one second, you have something to attach a slide hammer to, and voila! It actually takes several of these pins to work the dent out, but it is very effective, and a lot of fun. Fortunately, I'll have plenty of chances to use it, as the body has a few wrinkles. Once the dent is within 1/16" of flush, the Bondo may be applied. I worked for most of a year in a body shop in my early twenties. I learned a few basics (mostly enough to get into trouble) but never had enough practice to get really good at body and paint work. As for the body and paint on Matilda, I've decided to give it a shot, but it is notoriously difficult to make dark colors look good. I figure if I'm patient and don't mind redoing, and possibly re-redoing some things, I may have a chance at getting it right. If that doesn't work out, I may have to leave it to the pros.
Sunday, January 23, 2011
A Shiny New (ish) Sub-Frame
The new sub-frame arrived about ten days ago, and though I had my fingers crossed for the new old stock part Tim had mentioned, it was actually used. This turned out to be fine, since after a trip to Willamette Powder Fab, it looks brand new. I figured that after 40 years, the original finish of an NOS part would need a little freshening up anyway, and I got the same result at a lower cost. I also used a product from the Eastwood Company to coat the interior of the sub-frame with a rust converter/inhibitor. I used the remainder of the can in the unibody channels that may have some rust hiding out. Who knows if it actually does anything, but it definitely has psychological benefits. I considered attempting to swap sub-frames today, but ran short of time for what I have in mind. The idea is to not remove the engine, even though this part holds it in. Stay tuned.
Wednesday, January 5, 2011
Plotting and Planning
Things have gotten a bit slow lately, but the stars are about to come into alignment. After a patient, vigilant search, I located a replacement sub-frame. I spent several weeks checking ebay listings, until one morning while on a weekend getaway, I saw what I'd been waiting for. As we were away from a computer, I immediately bought the part from my phone. The thing about those small screens, is that it's easy to miss small details. It wasn't until I got notification that the part had shipped, that I noticed the sub-frame was for a coupe. A Z600 coupe. This little two door wonder is a sedan. So I now have a 65 lb anchor in my garage. No matter. I called Tim Mings to see if he could help my predicament. He told me that, not only did he have a NOS sub-frame, but if I happened to live in the area, I could come by and pick it up gratis! Since Corvallis is no where near San Diego, he agreed to ship it to me. Tim's had a few things going on, so after nearly a month, he got it on a UPS truck today! I hope to see it early next week.
I also got Bill Colford to order me a new front windshield gasket. His parts can take up to several months, as they usually have to be manufactured, but they are considered top quality. Once we have that, I will trailer the car to the glass shop to have the windshield installed. I will then pull it directly to the muffler shop to complete the exhaust system. This will of course take place after the new sub-frame, lower control arms with their new ball joints and freshly re-booted CV shafts are all reinstalled. At this point, I fully expect the car to be able to go down the road under its own locomotion. Of course, it won't be street legal...but that is merely semantics.
Labels:
1971,
body work,
Corvallis,
Honda n600,
Oregon
Sunday, April 4, 2010
A Little Brake Work, A Little Body Work
As usual, it's been quite a while since I've posted anything. I have actually made a little progress lately. I use the term, "little" in its literal sense. I recently picked up a media blasting cabinet, and a small parts tumbler. This allowed me to re-finish the power brake booster before reinstalling it. I've bent new b
rake lines for most of the brake system, and with the booster in place, have started installing them as well. While I was doing that, Chad got going on straightening out the header panel. That's a tough one, since we haven't got a straight one to match it to on any one of the three bodies we're working with. Considering the damage to the thin
metal of the header, Chad did a great job getting it where it needed to be. It should just need a skim-coat of Bondo, which is way less than it had when we started! We even got to use the stud-welder for more than just practice. A few rare parts have also presented themselves. I've had a few conversations with a fellow named
Bill Colford, who is very well known in N600 circles, and he let me know that he is offering side-marker lens replacements. I bought back-up light lenses from him a few months ago, and was glad to hear he had a line on these units. During the process of ordering a pair of side-markers from him, I inquired about shocks and struts. Bill was very helpful with a quick recommendation for a KYB rear shock that was a direct replacement. Unfortunately, front struts are going to be a bit more of a challenge. Apparently, Bilstein made a replacement back in the day, but no longer. It sounds like they will rebuild them if you can find a pair, but they are of course rare. I'm glad to have found shocks, as it will allow the rear axle to be installed when I get to that point. There's really not a ton of work to do before the body could come off the rotisserie, so that's what I'm shooting for.
rake lines for most of the brake system, and with the booster in place, have started installing them as well. While I was doing that, Chad got going on straightening out the header panel. That's a tough one, since we haven't got a straight one to match it to on any one of the three bodies we're working with. Considering the damage to the thin
metal of the header, Chad did a great job getting it where it needed to be. It should just need a skim-coat of Bondo, which is way less than it had when we started! We even got to use the stud-welder for more than just practice. A few rare parts have also presented themselves. I've had a few conversations with a fellow named
Bill Colford, who is very well known in N600 circles, and he let me know that he is offering side-marker lens replacements. I bought back-up light lenses from him a few months ago, and was glad to hear he had a line on these units. During the process of ordering a pair of side-markers from him, I inquired about shocks and struts. Bill was very helpful with a quick recommendation for a KYB rear shock that was a direct replacement. Unfortunately, front struts are going to be a bit more of a challenge. Apparently, Bilstein made a replacement back in the day, but no longer. It sounds like they will rebuild them if you can find a pair, but they are of course rare. I'm glad to have found shocks, as it will allow the rear axle to be installed when I get to that point. There's really not a ton of work to do before the body could come off the rotisserie, so that's what I'm shooting for.
Wednesday, July 1, 2009
UNDERCOATING!
Well, it finally happened. After over a year of prepping, pondering and a little painting, Matilda actually made it into Line-X for undercoating. My original plan was to load the body on the cheesy folding Harbor Freight utility trailer that I bought especially for this purpose, stuff the rotisserie into the back of my truck, and attempt to set up this contraption by myself. Thankfully Chad decided not only to help, but to rope his dad, Jim, into the adventure as well. Turns out, that three guys can just
pick the body up, and put it wherever it needs to go. The fact that Jim also has a fourteen foot car hauler that allowed us to put the whole setup on a moving platform, didn't hurt either. I had envisioned the need for all sorts of elaborate cribbing to hold the car in place during the trip to Salem, but since we were able to simply lift it into place when attaching it to the rotisserie, we just let it ride on the trailer deck, which it did like a champ. I noticed a number of people on I-5 trying to get a closer look at the strange little car on that trailer
.When we arrived at Line-X, we were greeted by the owner, Wade Starbuck and his crew. They were great to work with, as they were both professional and helpful. I was asked about use of the vehicle, placement of the material, and to what thickness I wanted it applied. Wade even went so far as to call me after the masking was complete to see if I wanted to get some pictures of the process! He explained that the material is a two part chemical blend that is kept separate as it is heated and pressurized to 2500 psi, before it is mixed by the spray gun during application. The amazing thing to me, is that after ten seconds it is set up well enough that you can walk on it! Another surprise is that Line-X is also practically non-toxic. I thought that any material that had all of these properties would definitely be adding to the hole in the ozone layer, but I guess we'll have to look to our other
pursuits for that.
Needless to say, I couldn't be happier with the finished product. This is exactly what I've had in mind for the last year. We have a surface that is practically bullet-proof, let alone rust-proof and will cut down on road noise. The best part is, now we have a great base on which to build a beautiful little car.
Labels:
1971,
auto rotisserie,
body work,
Corvallis,
Honda n600,
Line-X,
Oregon,
restoration,
Salem
Sunday, May 31, 2009
There's Color in the Air...
I realize it's been a long six months since my last post. For the past five and a half months, a lot of the same tedious tasks were taking place, and I knew few people would want to hear about the seemingly never-ending grinding off of paint down to bare metal. So I decided to wait and spare you the boring details. There was a lot of grinding, a lot of dust, and a lot of vacuuming and cleaning in between. I finished up grinding in mid-February, about a year after I began. I was ecstatic to finally be able to cross that task off the restoration checklist.
So, at long last, I finally got to shoot some paint on the body. This turned out to be a good way to figure out how to apply a few different types of primer and see how my garage spray-booth would perform.
Since I had taken most of the body to bare metal, it was necessary to dust it with an etching primer before proceeding to a catalyzed primer, and finally a single-stage body color. I was a little unsure as to when in the process I should seal the body seams. My Uncle Joe suggested etching, then sealing. I was leaning that way since it made sense, but it also added a bit of extra work. There's a window of time that you can shoot the next type of paint without having to re-sand and re-clean, and since I took the time to caulk seams, I missed that window. This meant that not only would I have to scuff the entire body with 100-grit paper, I would also have to re-shoot the etching primer before proceeding to the other two paint types. I didn't mind too much, after I had finished sanding, since it really seemed like the way to get the best bond.
All in all, I'm pretty happy with how it came out. I would be supremely disappointed if this were in any way supposed to resemble the finished product, because it does not! There are places that look like textured drywall, a few landslide runs, and I actually ran out of body color! If I'm reading the data sheets correctly, I should be able to pick up a quart of paint tomorrow, and still be within the window for re-coating, so that part should be okay. As for the blemishes, this only really needs to look decent in the engine compartment and interior. The rest of it will either fall within the tiny unnoticeable spaces around window glass and doors, or be covered completely.
The best part about having cleared this hurdle is that the next chance I get, I can finally get this thing in for undercoating, and then start making some real progress!
—GP
Labels:
1971,
auto paint,
body work,
Corvallis,
Honda n600,
Oregon,
restoration
Friday, March 14, 2008
1971: A Race Oddity
Click the play button to see Matilda's successful ride on the auto rotisserie.
Sunday we had Chad over for breakfast, and a little "car-listhenics". That's getting exercise by lifting a small car off of a motorcycle trailer. We then unloaded the rotisserie and started setting it up. I had already read the instructions, and watched a video on the proper way to rig the Whirly Gig Body Handler, but that didn't stop us from figuring it out anyway. Actually, Chad had to get to work, and even though I didn't really expect to have it up and running in one day, I had it horizontal by lunchtime! I must say the little car looks pretty cool rigged as it is, and it's going to make the undercarriage work a snap.
Labels:
1971,
auto rotisserie,
body work,
Corvallis,
Honda n600,
Oregon,
restoration
Sunday, March 9, 2008
Light as a feather, stiff as a board....RISE!
In preparation for loading onto the auto rotisserie, Matilda's body was lifted off the trailer and onto the floor.
Labels:
1971,
auto rotisserie,
body work,
Corvallis,
Honda n600,
Oregon,
restoration
Sunday, March 2, 2008
Rotisserie Retrieval
So, this morning, we got up early (for a Sunday) and got after it. Carley had a study date with another X-ray student in Lebanon (the town, not the country), and I met Chad for a quick trip to Cottage Grove to see his parents and pick up the auto-rotisserie. It was my first trip to the folks' place, and what a place it is! Right after crossing the river that they refer to as "the creek", you're immediately greeted by a very quaint Tudor-style home nestled in the woods, and a full professional grade auto shop that would make any mechanic's mouth water. Chad's dad, Jim had the larger pieces of the rig suspended by chain from the cable crane of his heavy equipment service truck, making load-up a snap. I was treated to a tour of his shop, which included a look at a few of the cars he's restored o
ver the years. I see where Chad gets his knowledge of, and his love for cars. After a nice visit with his mom, Nancy, we were back on the road, stopping only to save the life of a wayward salamander. We transferred everything to my truck where it was parked, and now await the opportunity to set this puppy up! —GP
Monday, February 11, 2008
Body Work Begins
Even though we are blessed enough to have an almost completely rust-free body, there were a few little spots that needed some attention. Fortunately, they are in places that will never be seen, but since we are doing this thing all the way, I figured it'd be a good chance to remind myself how to do this body work stuff. The worst of the two places that had actually rusted through, was under the driver-side door sill plate. I remembered taking care of some similar holes in a car when I worked for Tom Brown at Coachworks Autobody when I was nineteen. It involved tapping the rusty spot with a pointed hammer until you've broken out anything that isn't solid metal. This has the effect of bending the surrounding area down slightly which makes the body filler portion of the repair work better. Then you cut some light-gauge sheet metal into shapes that will fill the hole, while sitting into the recess created by the hammering. Next, you apply a coat of Duraglas (fiberglass body filler) to the hole, insert your metal plates, and cover the whole works with another layer of Duraglas. After sanding, and re-filling any low spots with regular Bondo, it's ready for primer. —GP
Labels:
1971,
body work,
Corvallis,
Honda n600,
Oregon,
restoration
Subscribe to:
Posts (Atom)